Navigate to the Transport Execution module to view a comprehensive list of all tractors that are currently active and not subcontracted, as noted in the "Vehicles" module.

Module 'Transport Execution'
The Fleet View provides detailed insights into each vehicle's operational status and assignments. Here's a guide to understanding the information each column presents:
-
Route Icon
Clicking on the route icon will display the planned schedule for the selected vehicle, providing a visual overview of its itinerary.
-
First Column
The first column contains detailed information about the vehicle:
- First Row: Displays the registration number of the vehicle and attached trailer (if any). Grey dots = incomplete addresses, green dots = completed addresses.
- Second Row: Lists primary and secondary drivers and dispatcher.
- Third Row: Shows vehicle's last GPS position.
Next Address
Displays next stop details including location, weight, loading meters, and ETA.
Destination
Shows final stop including country, city, postal code, and client name.
Clicking on the route icon opens a pop-up with the detailed itinerary:
Module 'Transport Execution'
Stopovers allow you to add operations such as driver boarding/leaving, trailer attach/detach, ferry/train stops, etc.
- Address: Location of stopover.
- Type of Stopover: Operation type.
- Planned Time: Scheduled time.
To manage a driver boarding or leaving a vehicle, follow the procedures below:
Driver IN
- Add Stopover: Click "Add Stopover" to open the side tab form.
- Select Type: Choose Driver IN.
- Fill Mandatory Fields: Complete required fields including "Next Driver".
- Business Trip Checkbox: Check if applicable. Reveals fields:
- Start of Business Trip
- End of Business Trip
- Shift Code
- Populating Shift Codes: Auto-populates the "Shifts" module after completion.
Driver OUT
- Add Stopover: Click "Add Stopover" to open side tab form.
- Select Type: Choose Driver OUT.
- Business Trip Checkbox: Populate fields for confirming trip:
- Start of Business Trip
- End of Business Trip
- Shift Code
- Confirming Business Trip: Update if trip ends earlier than planned.
Attach, Detach and Exchange Trailer
- Add Stopover: Click "Add Stopover" to open side tab form.
- Select Type: Choose Attach Trailer.
- Fill Mandatory Fields: Complete required fields including "Next Trailer".
To mark an address as completed:
Click on the truck logo, then select the checkbox next to the address you wish to complete. This reveals additional options:
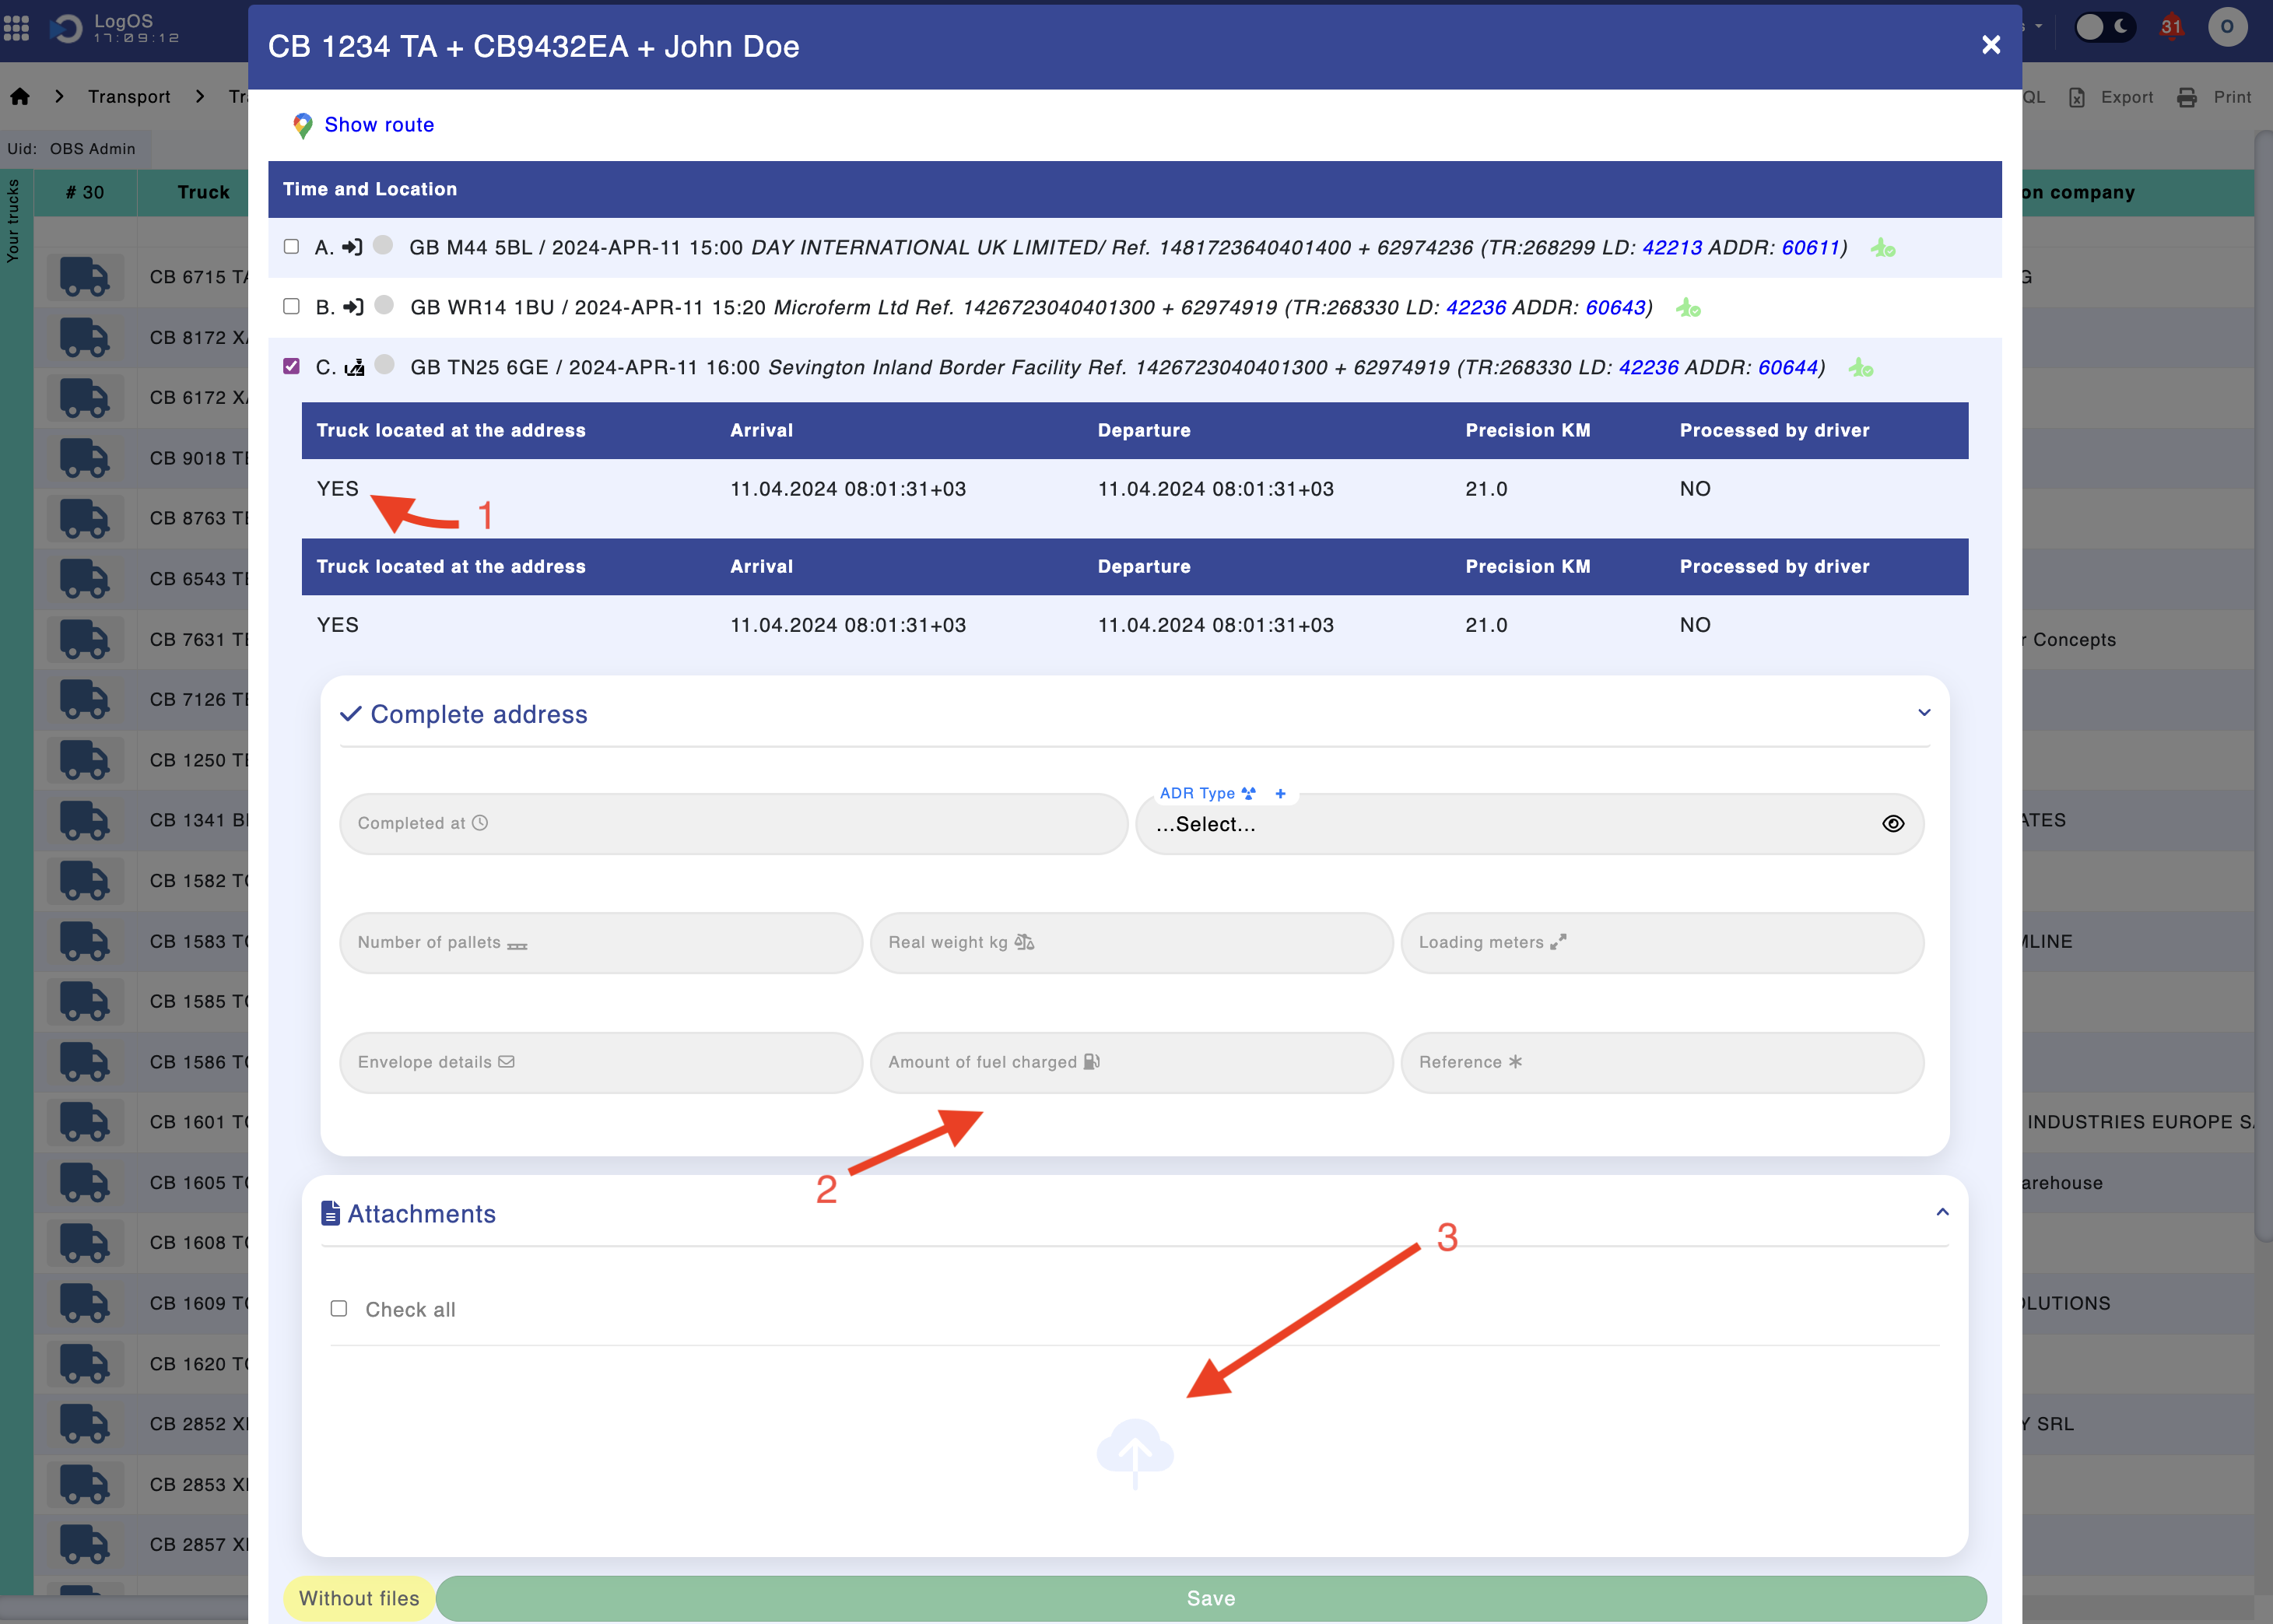
Module 'Transport Execution'
- Verify GPS recorded arrival within geofence.
- Insert actual kilometers driven, weight carried, time of completion, etc.
- Option to upload files such as CMR if not already imported.